Testing is a very critical part of game development. It helps fix up holes in your game’s logics/mechanics, It ensures that your game progresses as intended, and more. This tip helps your development process by allowing you to spawn your character at the current location of the camera.
Normally, in Unreal Engine; your character will spawn at the “Player Start” object. This can be overridden in your game mode. The other place to override this, without editing code or blueprints; is in the dropdown menu next to the play button.
There is a option in the play menu to spawn the player at the Current Camera Location.
If you click the arrow next to the play button, you can select to spawn the player at the current camera location. It’s that simple. From there you can use this to more easily test parts of your game that are spread apart.
I’m still trying to find out to test out different data settings. When i find out the best way, i’ll create a new post.Thanks for reading.
Are you looking for FREE high-quality assets for your Unreal Engine game? If so, then your should take a look at Quixel Megascans. It’s free for Unreal Engine users!
Megascans is a massive online scan library of high-resolution, consistent PBR calibrated surface, vegetation and 3D scans, also including desktop applications for managing, mixing and exporting your downloaded scan data.
You can find them in the Unreal Marketplace in the free section, or you can go over to their website. You can login to their site using the same Epic Games account you use for the Unreal Marketplace.
NOTE: The assets in the Unreal Marketplace can be very large.
Tip – Download directly from the website for quicker usage.
If you do not need the amazingly realistic 8k version of their asses for your game, you can choose the 2k or 4k version when directly downloading from their website.
Making a high-quality game doesn’t have to completely break the bank. Be sure to check out the Quixel Megascans Library. Theres a link to the official post below:
This snippet will show you how to make your character to an exact height.
Jumping is in nearly every game. Very often a entire game’s mechanics will revolve around jumping itself.
Here is a quick script on how to make an object in unity jump to a given height. NOTE: Some high school math may be required to understand the concepts, but not to copy and paste the snippet 😀
using System.Collections;
using System.Collections.Generic;
using UnityEngine;

[RequireComponent(typeof(Rigidbody))]
public class PlayerComponent : MonoBehaviour
{
    // The height you want the player to jump
    public float jumpHeight = 10;

    private Rigidbody mRigidbody = null;

    // Start is called before the first frame update
    void Start()
    {
        mRigidbody = GetComponent<Rigidbody>();
    }

    // Update is called once per frame
    void Update()
    {
        if (Input.GetMouseButtonDown(0))
        {
            // Maximum Altitude = vertical velocity squared / ( 2 * gravity )
            // Maxmium Altitude * 2 * gravity = Vertical velocicty squared
            // sqrt ( maximum altitute * 2 * gravity ) = vertical velocity
            mRigidbody.AddForce(Vector3.up * Mathf.Sqrt(2 * -Physics.gravity.y * jumpHeight), ForceMode.Impulse);
        }
    }
}
The magic happens here:
Mathf.Sqrt(2 * -Physics.gravity.y * jumpHeight)
Here is an explanation of where this comes from. The maximum height of a projectile can be calculated as:
hmax=vvert2/2g
In this equation, hmaxis the maximum height of the projectile (aka the height we want to jump), vvert is the vertical velocity required to reach that height, and g is the force of gravity.
If we set our player’s vertical (y) velocity to vvert it will reach hmax . We find vvert by simply dividing hmax by 2g, then getting the square root of that value.
hmax=vvert2/2g
hmax (2g)=vvert2
sqrt(hmax (2g))=vvert
These concepts can apply in any game engine, you would just have to adjust the script. The math would remain the same.
In my awesome assets segments, i want to give a quick mention to any awesome assets i find in the Unity Asset store or Unreal Engine Marketplace.
Environments are incredibly important in games. A good environment can make a good game seem great. One important aspect of good environments is the sky.
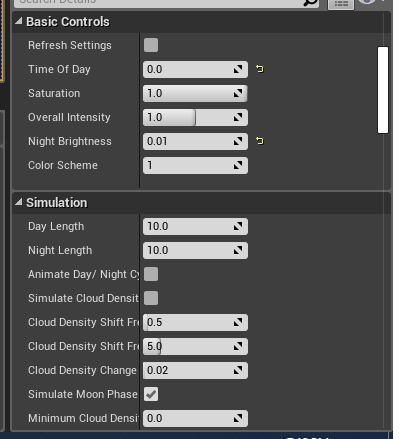
The Ultra Dynamic Sky asset on the Unreal Marketplace can help QUICKLY give your game AAA quality sky.
The asset just needs to be dropped into your scene, then you can tweak it’s Settings to match your game. Here are some of the settings you can tweak to achieve your perfect sky.
Every month Epic games offers developers free Marketplace assets. Sometimes worth several hundred dollars, this is a deal you can’t overlook. In addition, once you get the assets; you have them forever.
This month Epic Games is giving away the following assets for free:
I recently made a post about Unity’s Black Friday Sale. Epic Games is also hosting a Black Friday sale in the Unreal Engine 4 Marketplace. The sale lasts until December 4th.
I’ve previously mentioned this in my previous post about Unity’s Black Friday Sale. Tl;Dr The Unreal Engine Marketplace has tons of content that you can use for making multiple games in the Unreal Engine. If you do not have the time, money, or skills to do a particular task, there is certainly something in the marketplace to assist you.
Some items are up to 70% off their normal price, and can be used for multiple games. Be sure to check it out.
The Unity Asset Store is having a black Friday sale. The sale lasts until December 1st. Some of it’s top assets are up to 50% off.
Why use the asset store?
Not every developer or studio has the skills, resources, or time to create a game purely from scratch. The unity asset store as 3d models, music, starter kits, editor utilities, sounds, and more.
The asset store can get you the help you need in the areas you may be lacking in, for an affordable price. Once you buy an asset you can use it on multiple projects also, so it can be considered an investment also.
Whether your making a prototype for fun, or are targeting a multi-platform release; the asset store had something for you.
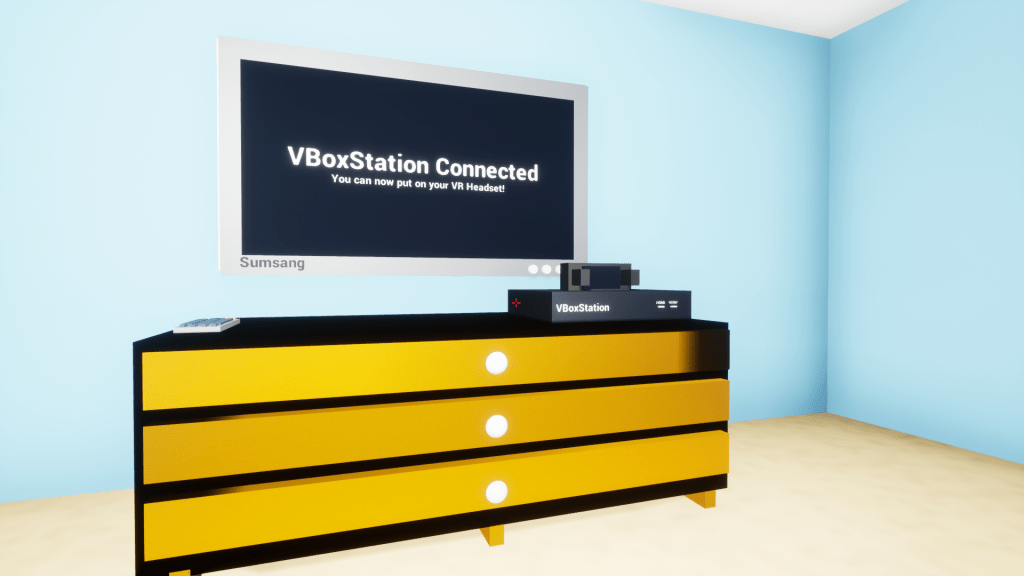
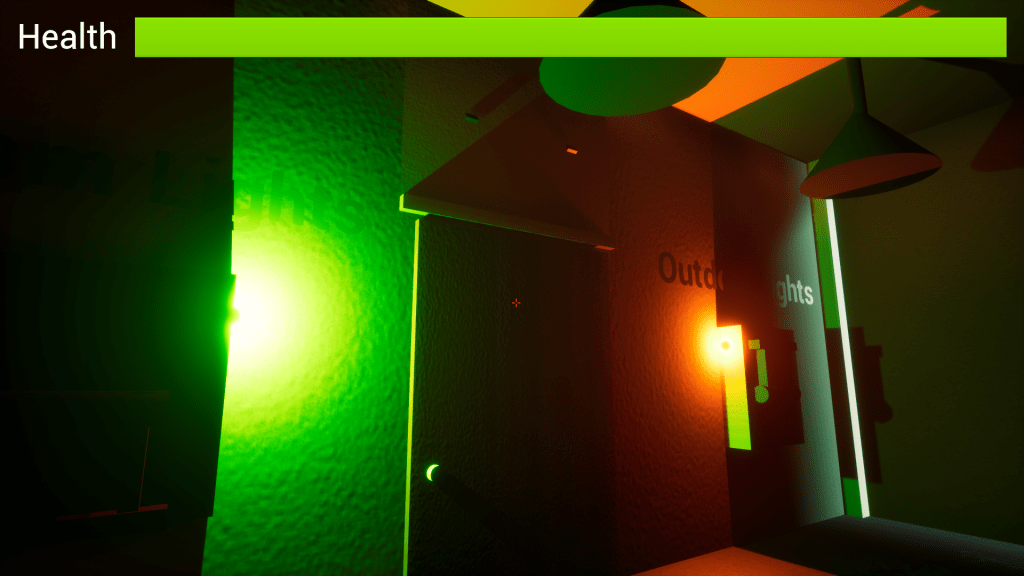
I made a fps game. In this game the player is playing a VR game console. The console constantly lies to the player. Eventually the player will leave the simulation.
The idea behind the VR game console came from the hosts including “the game is” in the title. That’s just how I interpreted it.
I’ve thought about continuing it. But I’m not exactly sure what direction I would want to take it in to really make it engaging and interesting.
Stats and Results
I had a total of five reviews. Here we the overall stats for my game.
Graphics: 3.043
Theme: 2.704
Audio: 2.366
Overall: 2.507
Innovation: 2.366
Game Design: 2.366
Fun: 2.19
I think I needed more reviews. Five is difficult to really get an accurate description of. I should have put my game out more, but it didn’t help that I had a large size downloadable game. I saw alot of entries were web based.
As, for the rest of the entries;Here are the results:
Overall Winner: Black and White
Fun: Jimposters
Innovation: Clickhead
Theme: Race Track: a track of lies
Graphics: The tutorial
Audio: Mendacium
It was a fun experience. I’m glad I did it. Next time I’ll probably try to do even better.
Often while making games in Unreal i’ll use the basic 3D primitive shapes(spheres,cubes,planes,cylinders,and cones) for prototyping levels. In Unreal Engine you can merge a set of actors into a new (reusable) static actor.
This is great for building levels and props without 3D modelling experience, or if you need a placeholder until the actual prop is ready.
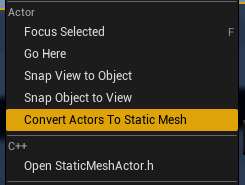
To merge actors into a single static mesh, select a group of actors. Then right-click on them. There should be a menu option named “Convert Actors to Static Mesh“. Select that option, then choose the save location and name. After that, you can reuse the created static mesh as many times as you want.
One caveat is that the origin isn’t always where you want it to be, but that is a minor inconvenience for such useful fuctionality.
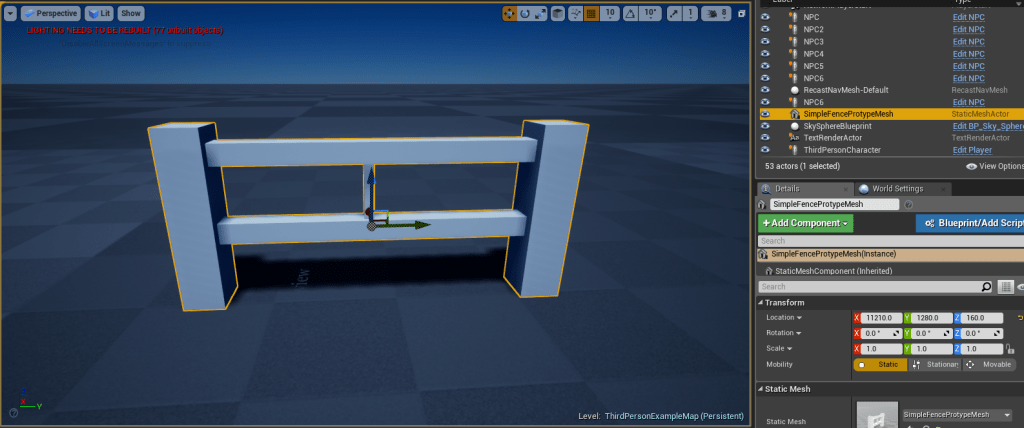
Example – A Simple Fence
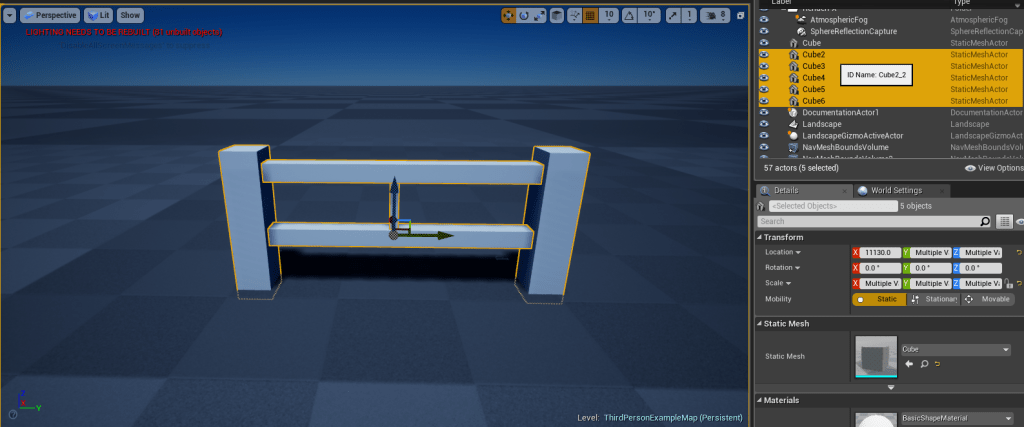
Step 1, Drag a basic cube onto the scene.
Step 2, move & scale the cube. Then create duplicates, and move & scale them. You should end up with a fence made up of multiple Cube static mesh actors.
Step 3, select the cubes and right-click.
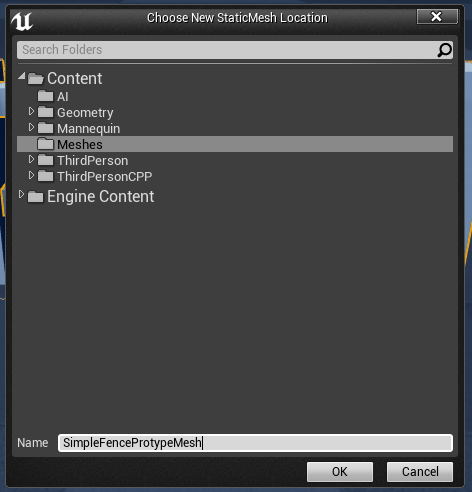
Step 4, select “Convert Actors to Static Mesh” and, select a save name and location.
Name it whatever you like.
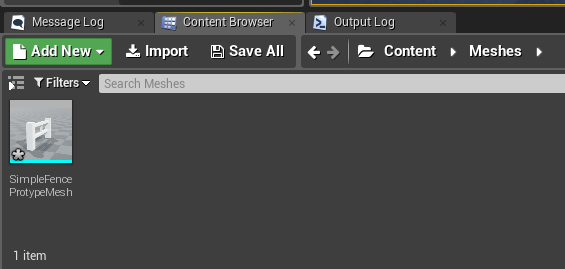
Step 6, locate your new static mesh.
The default save location is “Content/meshes”, but you can specify anywhere.
Step 7, drop it in the scene. NOTE: The existing actors will still be in the scene after you create the static mesh, you can reuse them, or delete them once you have confirmed it’s creation.
Our new simple fence static mesh! Only One item in the world outliner!
And that’s it!
Why would i want to do this?
It reduces the amount of actors in the world outliner.
It allows you to easily build levels without 3d modelling experience.
It’s fast & quick. Great for Game Jams and prototyping.
In my entry for the August 2019 Community Game Jam, i did this with the buildings. Each building probably consists of 10+ Cubes. I built out the building, merged the 10+ actors into a static mesh, and saved a lot of space in my world outliner.
A follow up to a previous post. I entered a game jam one week ago. I’ve finialized my submission. It’s been a interesting week. Things didn’t always go as planned. Improvision was sometimes the neccessary route.
The VBoxStation. I mispelled this the VRBoxStation so many times!
I’ll make a in-depth post a little later when i have time to relax and take some input in, but i’ll give some simple details. The theme of the game jam was “The Game Is a Liar”. My game is a FPS game about a guy/girl who got a new virtual reality console. I do not want to spoil anything else.